

Observations
Conducting Your First Observation
Start an observation, fill in the form, save a draft, and submit it.
This article walks through one observation from start to submit, using a classroom walkthrough as the example. The steps are the same for a formal observation; only the form set changes.
Role: Observer. You also need at least one school in your profile that has teachers with the Observable role. If New Observation is missing from your menu, ask your administrator to check your roles and schools.
1. Start the observation
Section titled “1. Start the observation”- Click New Observation in the menu. (You can also click New on the Observations page, or in the ⋮ menu on Conducted Observations and All Observations.)
- In the Create Observation window, check the fields:
- Observation Date: today’s date and time. Change it if you are entering a visit from earlier.
- Organization: the school you visited. Only schools in your profile appear.
- Form Set: the form set to use. The list shows the form sets available at that school.
- Formal observation: on accounts with performance reviews, check this box for a formal observation. Leave it clear for a walkthrough or other informal visit.
- Click Begin Observation.
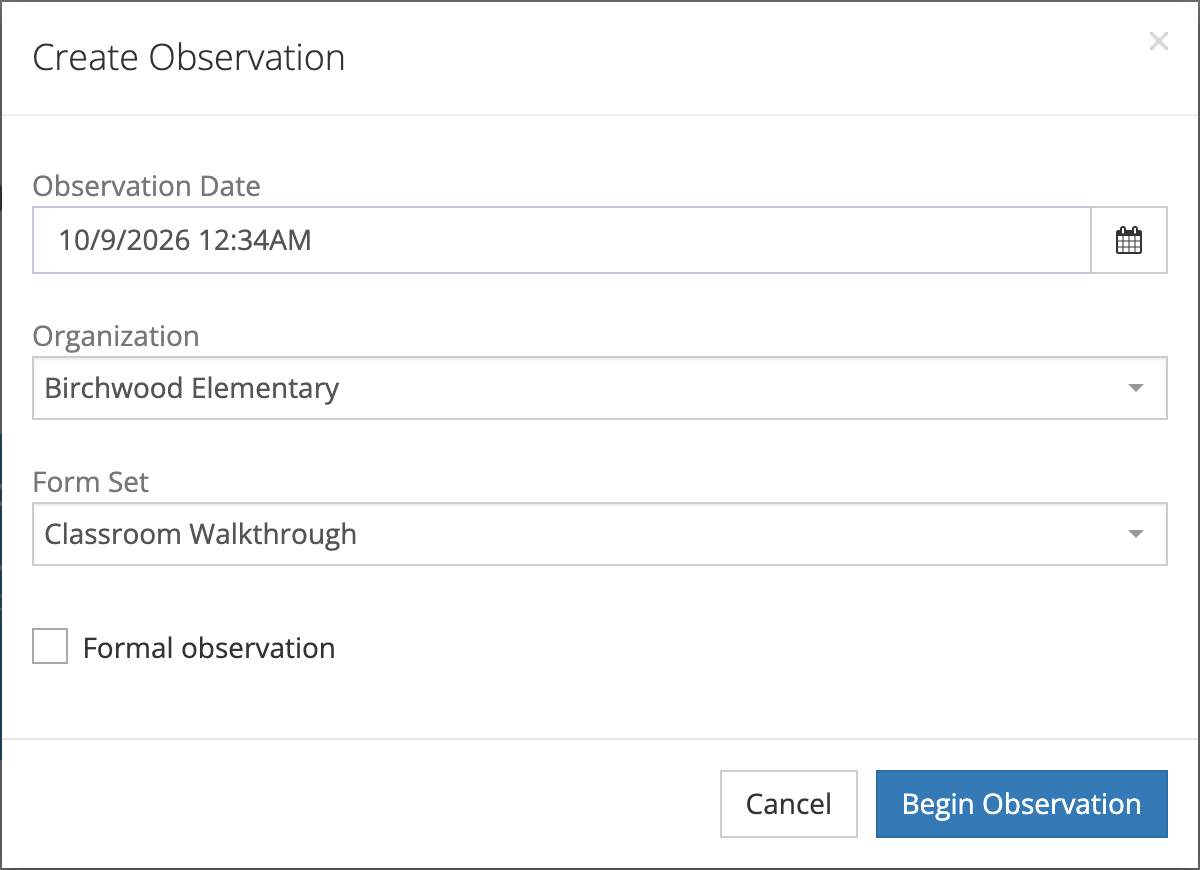
If the window says you do not have schools assigned to your profile, ask your system administrator to add you to a school.
2. Fill in the classroom information
Section titled “2. Fill in the classroom information”The New Observation page opens with Classroom Information at the top. Form Set and Organization are fixed from the previous step. Choose:
- Class Period, Grade Level, and Content Area (all required). The lists show only what your district attached to the school, so an empty list means the school is not set up yet; see Getting a School Ready for Observations.
- User: the teacher you observed (required). The list shows active members of the school with the Observable role.
- Date and Formal stay editable here.
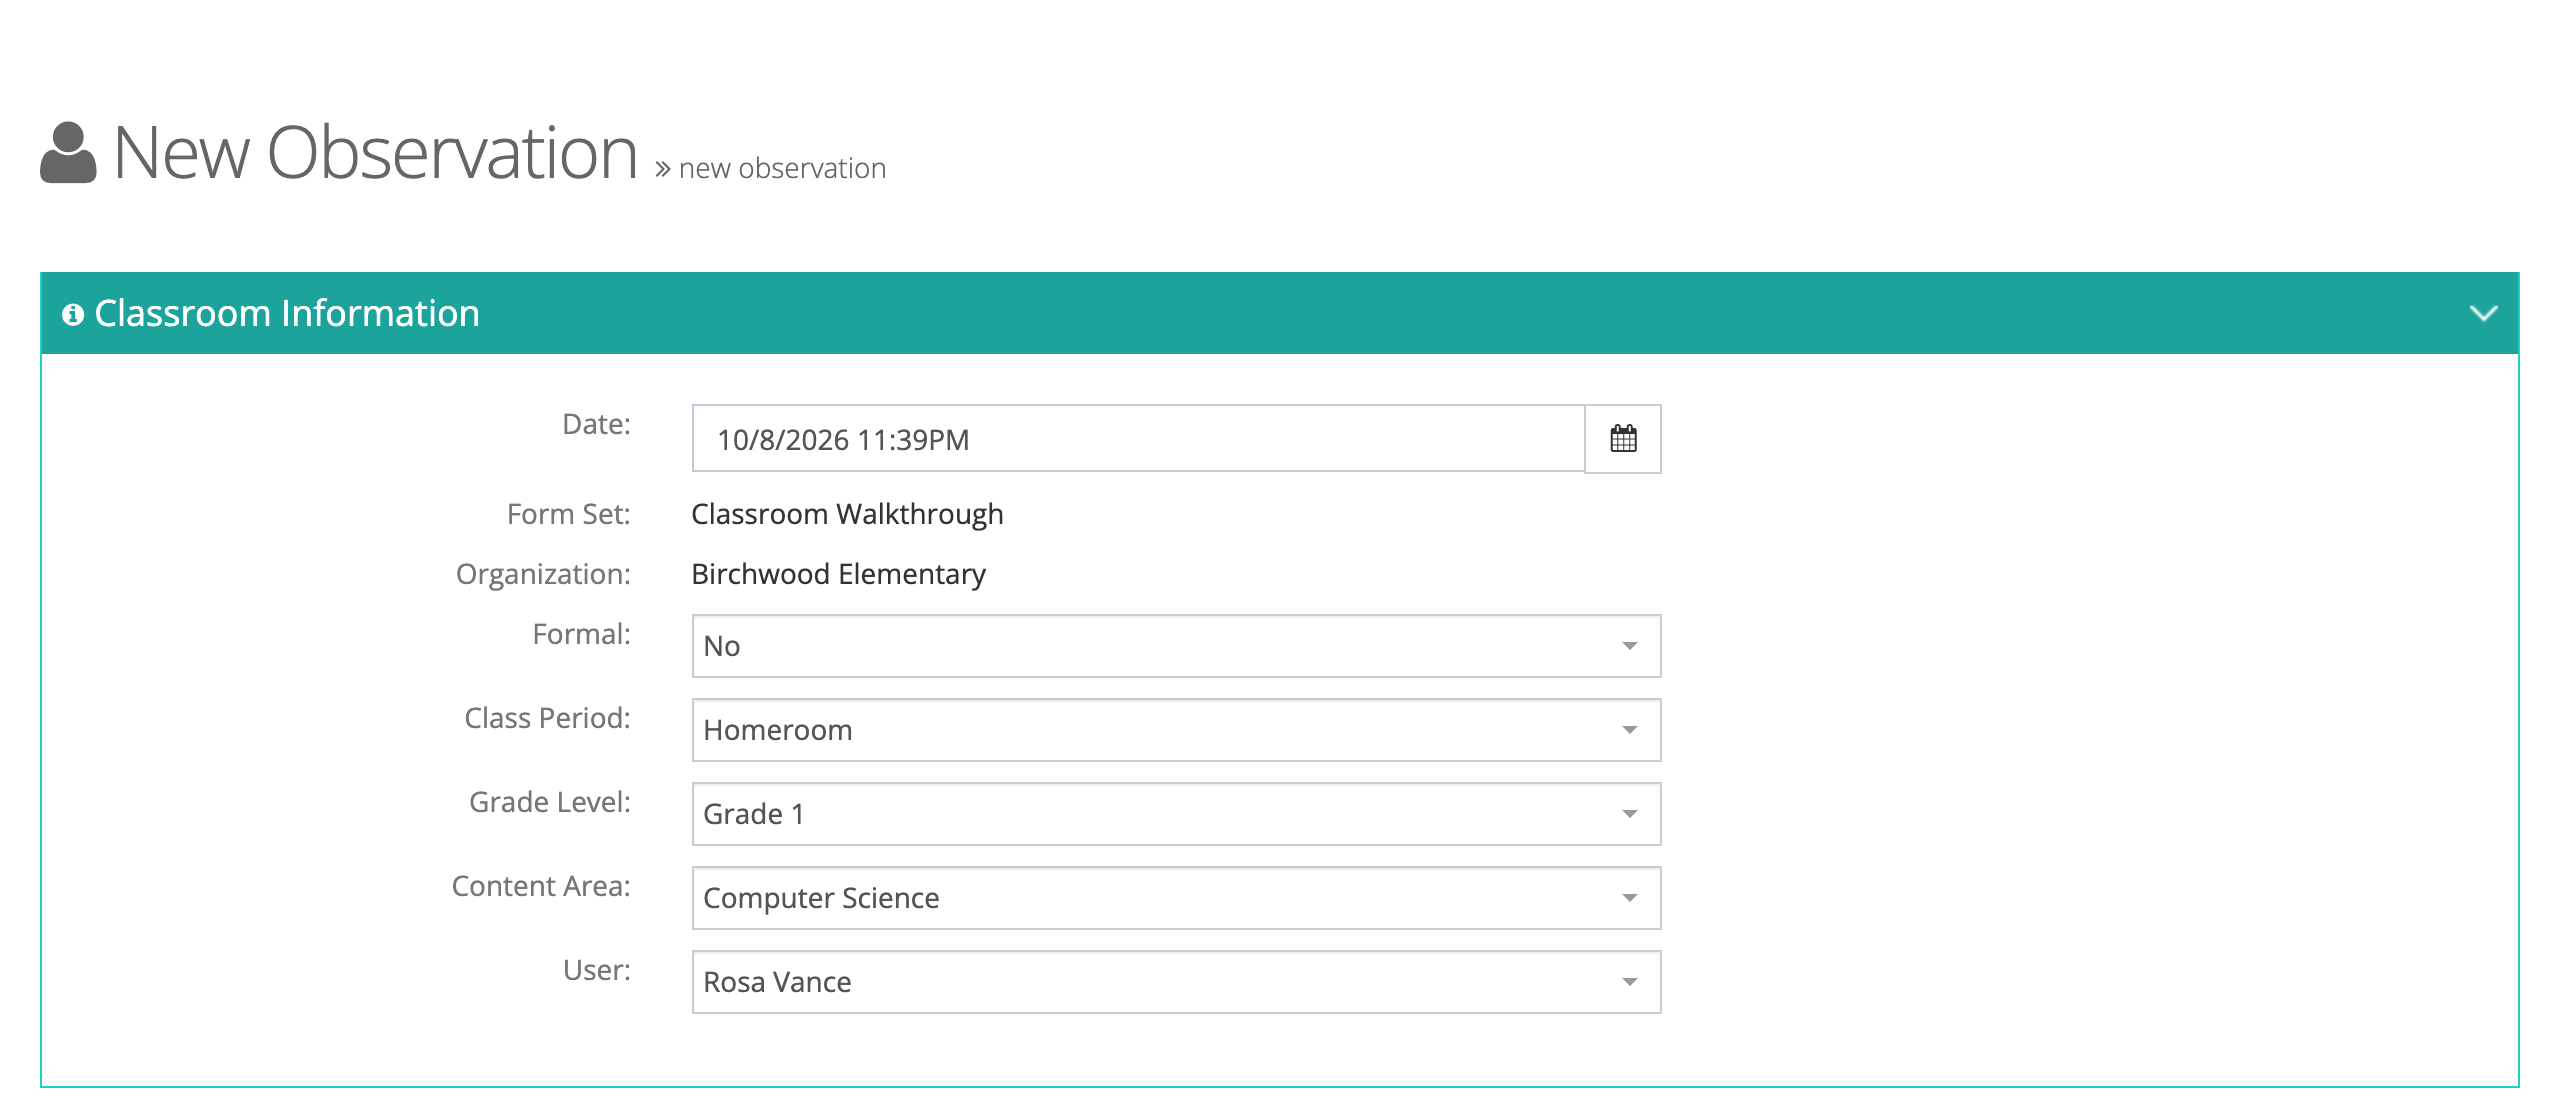
If your district uses coaching cycles and the teacher has an active coaching assignment, a coaching reminder appears under User. See Coaching.
3. Answer the questions
Section titled “3. Answer the questions”Below the classroom information, each form in the form set appears as a panel, divided into sections. Click a question to expand it, then make your selection under Select One:. Where a choice carries points, its Point Value shows under it. A red asterisk marks a required question, and when a form has any, the note Indicates a required question. appears above the forms.
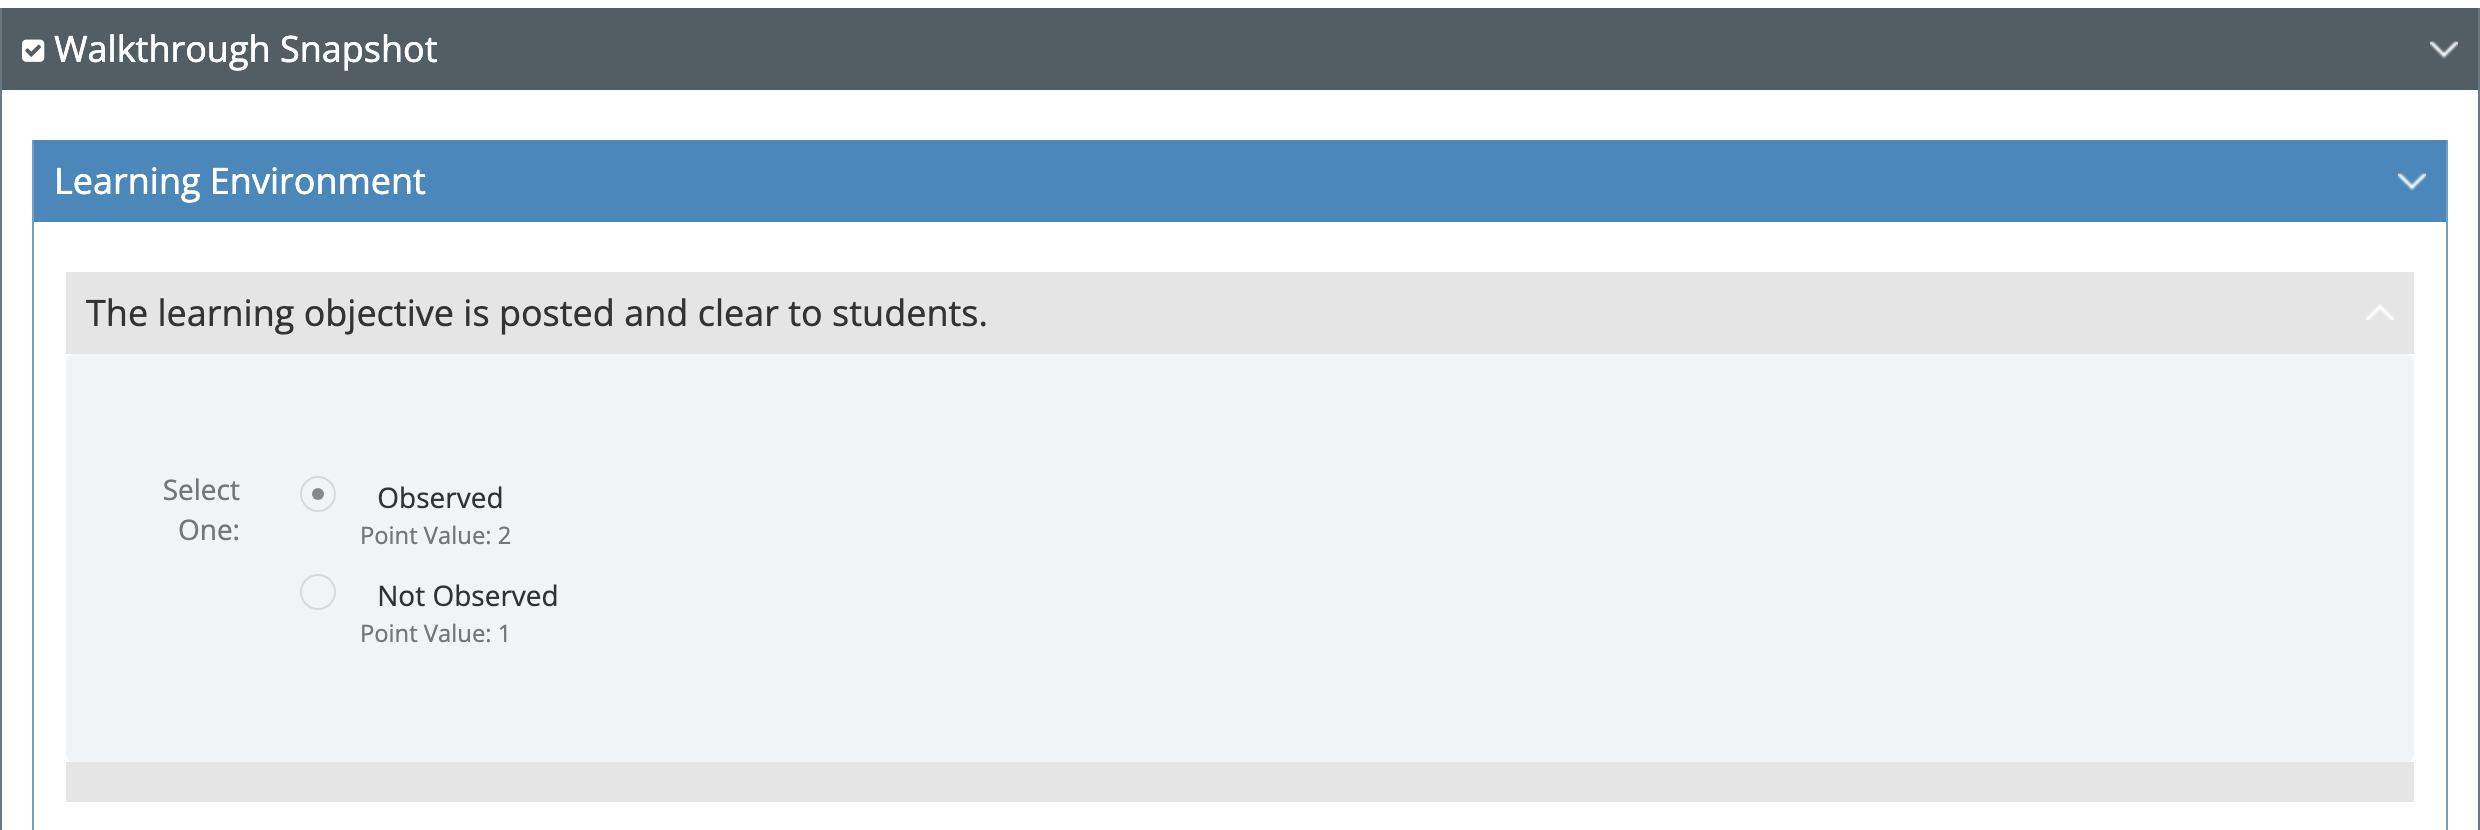
Depending on how your district built the form, a question may also offer:
- Add feedback: a box for written feedback on that question.
- Attach Files: attach a photo, video, or PDF as evidence.
- A help icon with guidance on what to look for.
Feedback and attachments are covered in Comments and Attachments.
At the bottom of the page, Overall Feedback holds your written summary of the visit. If your district has feedback templates, you can insert one from the editor toolbar; see Feedback Templates, Tags, and Focus Area Mentions.
4. Save the draft
Section titled “4. Save the draft”Click Save Draft. Saving creates the observation as a draft with the status Open. The teacher cannot see a draft.
The observation page opens. While it is a draft you can click Edit to change any answer, or Delete to remove an observation started by mistake (for example, the wrong teacher or form set).
5. Submit
Section titled “5. Submit”When you are finished, use the panel on the right of the observation page and click Submit Observation.
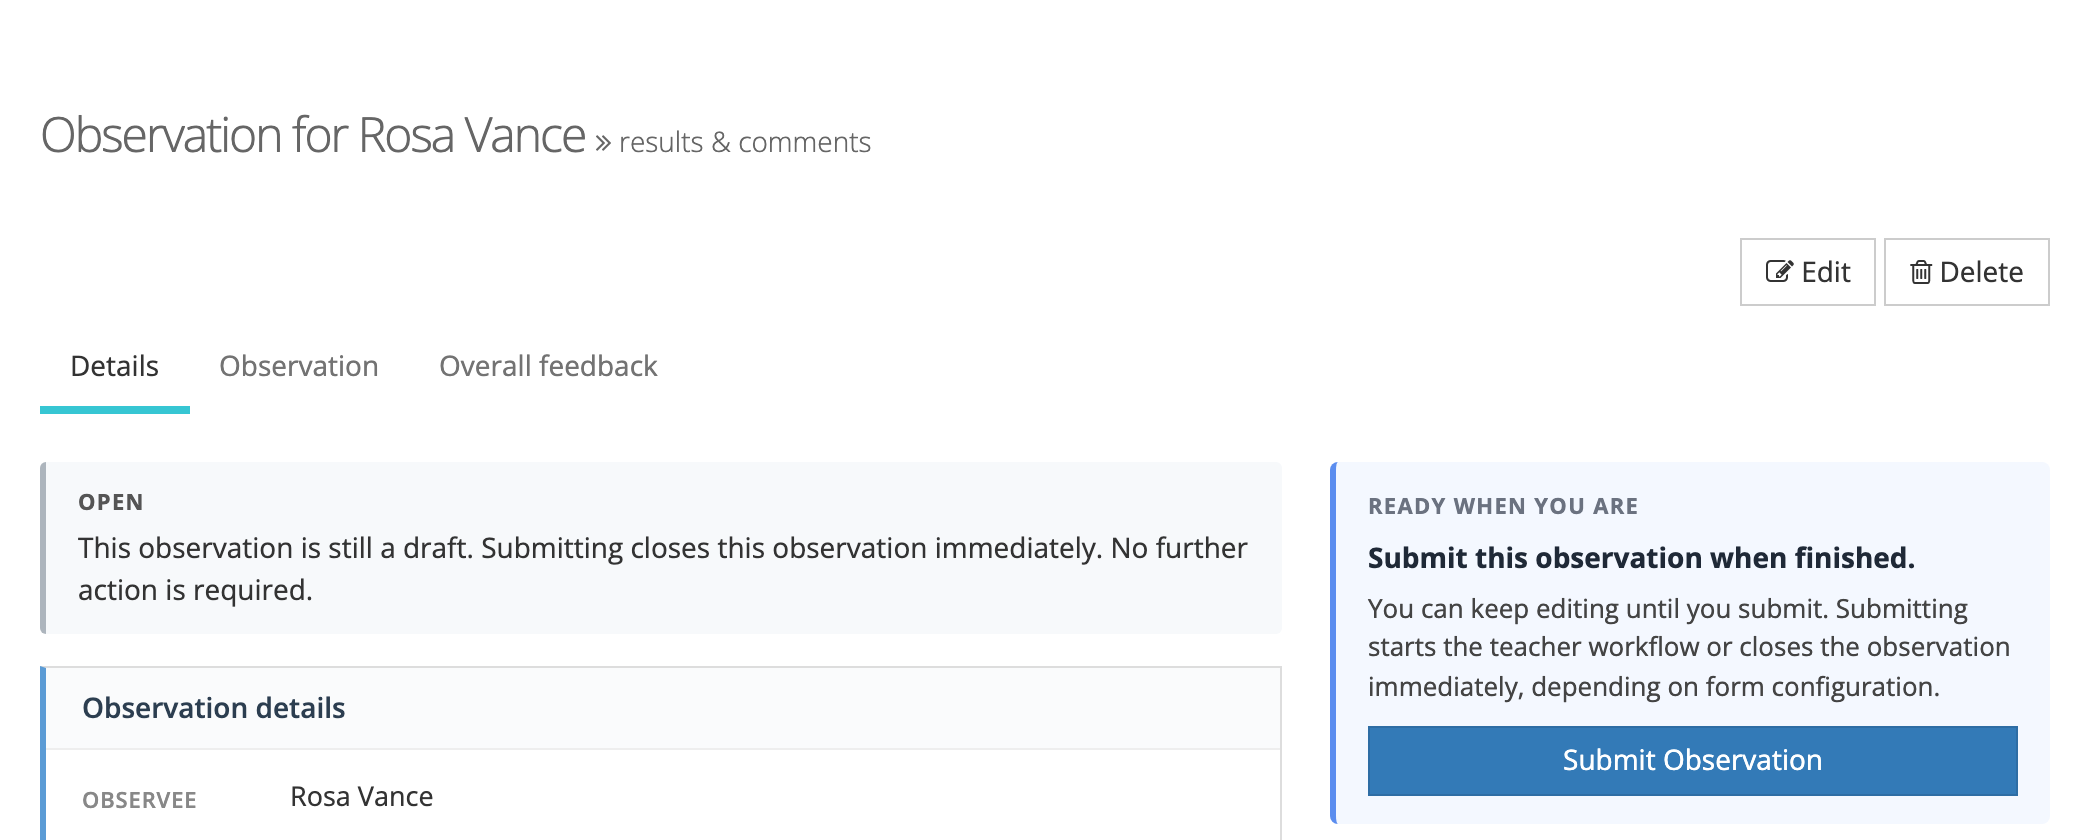
A confirmation window explains what happens next, and you click Submit Observation again to confirm. What happens depends on the form set:
- If the form set asks the teacher to reflect or acknowledge, the observation is locked and the teacher is asked to respond. You can close it after they do. See Reflection & Acknowledgment.
- If it asks for neither, the observation closes at once.
Depending on your district’s settings, you and the teacher receive an email copy when the observation closes. For every status message and button on this page, see The Observation Page.
After you submit
Section titled “After you submit”- The observation appears on your Conducted Observations list and on the teacher’s My Observations. See Managing Observations.
- Scores and feedback are on the observation page. See Scores and Reopening.
- If something needs to change after submitting, reopen the observation. See Scores and Reopening.
Tips for K-12 observers
Section titled “Tips for K-12 observers”- Enter what you saw, not what you inferred. Feedback tied to an observable moment (“students restated the objective in their own words”) is easier for a teacher to act on.
- Keep walkthroughs short and frequent. A brief, focused form used often gives a better picture of a classroom than one long visit a year, and the dashboard shows whether every teacher is being reached.
- Save as you go. A draft keeps your work if you are interrupted, and only you and your administrators can see it.