

weCLIMB Mobile
Filling In the Observation Form on Mobile
Answer each question type, score rubric sections, write feedback with templates and focus-area tags, and add photos or video in the weCLIMB mobile app.
Roles: Observer. Administrators can do the same when they edit an observation they did not conduct.
Once you choose the class and the person on the Create Observation screen, the form set’s forms appear below Classroom Information. This article covers everything you do inside the form. To get to this point, see Starting an Observation on Mobile.
Read the form list
Section titled “Read the form list”Each form appears under its name, broken into its sections. Every question is a row that shows where it stands:
| Row label | Meaning |
|---|---|
| Required | You must answer it before Save turns on. |
| Attachment required | You must add a photo or video before Save turns on. |
| Not answered | Optional and still blank. |
| The answer (for example Observed) | Answered. A row with feedback shows the start of it in quotes. |
A rubric or matrix section is a single row that shows “2 of 5 scored” while you work and Complete when every row has a score. The form ends with its Total.
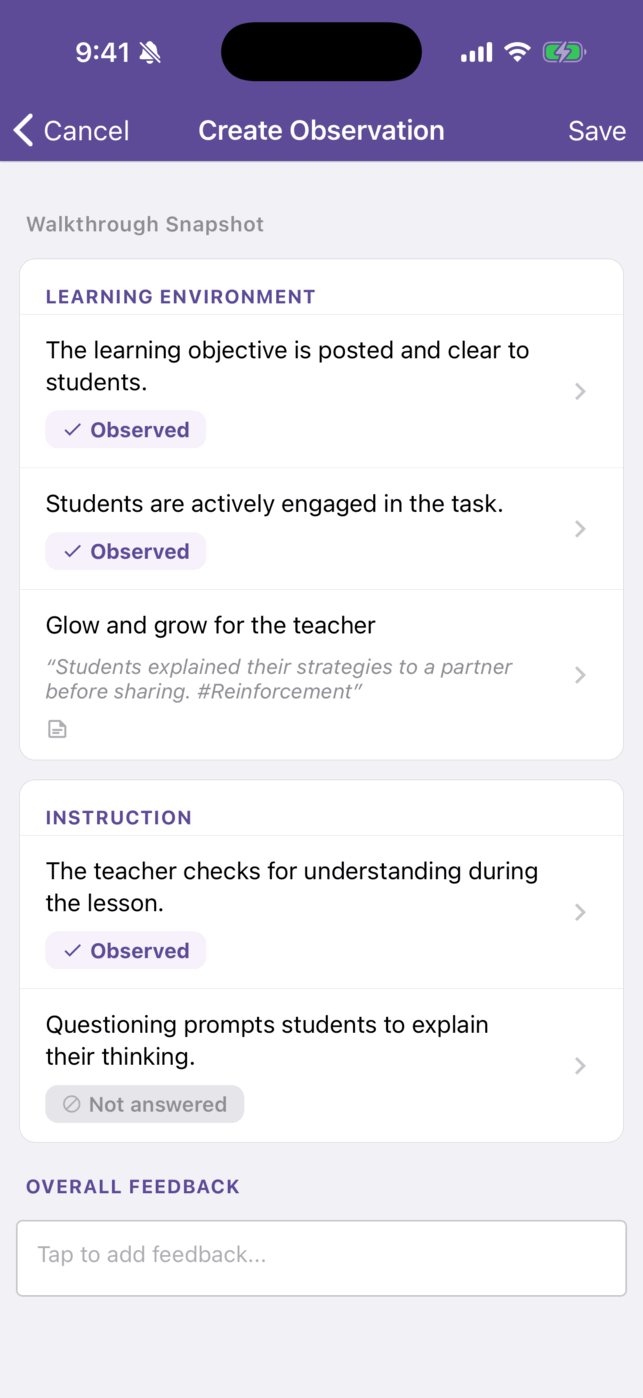
Answer a question
Section titled “Answer a question”- Tap the question row. The question opens on its own screen with the question text at the top.
- Answer it on the Answer tab.
- Tap Done in the top-right corner to go back to the form.
Your answer is kept as you go; Done returns you to the form list. Nothing is sent to Master Teacher until you save the observation.
The tabs under the question depend on how the question was built:
- Answer is always there.
- Feedback appears when the question allows feedback.
- Files appears when the question allows attachments. Its label shows how many files you’ve added.
A check mark on a tab means it has content.
Question types
Section titled “Question types”| Type | How you answer |
|---|---|
| Single choice | Tap one option. Tapping a different option switches your answer. |
| Multiple choice | Tap every option that applies. Tap again to clear one. |
| Counter | Use + and - beside each option, or type the number. Use it to tally, for example, how many students answered a question. |
| Written answer | Type in the text box. The same formatting toolbar as feedback is available. |
Some options show help text under the label or an information icon. Tap the icon to read the full explanation your district wrote for that option.
Rubric and matrix sections
Section titled “Rubric and matrix sections”A rubric or matrix section opens as one screen holding every row of the section, so you can score the whole section without going back and forth.
- Rubric: each row shows its performance levels as cards with the level text and its point value in parentheses. Tap the level you observed. Below the rows, Section total shows points earned out of points possible and the percentage. Tap View details for the row-by-row breakdown.
- Matrix: each row lists its choices. Tap one per row. Tap View Details on a row to see what was selected.
The Answer tab shows how many rows you’ve scored (for example “3/5”). The section’s Feedback tab holds Section feedback for the whole section.
Write feedback
Section titled “Write feedback”You can give feedback in three places:
- Per question: the question’s Feedback tab.
- Per section: Section feedback on a rubric or matrix section.
- Overall: tap Tap to add feedback… under OVERALL FEEDBACK at the bottom of the form. It opens the Overall Feedback editor; tap the check mark to keep your text or the X to discard it.
The feedback editor has a toolbar for bold, italic, underline, strikethrough, bulleted and numbered lists, and headings (Aa), plus a templates button.
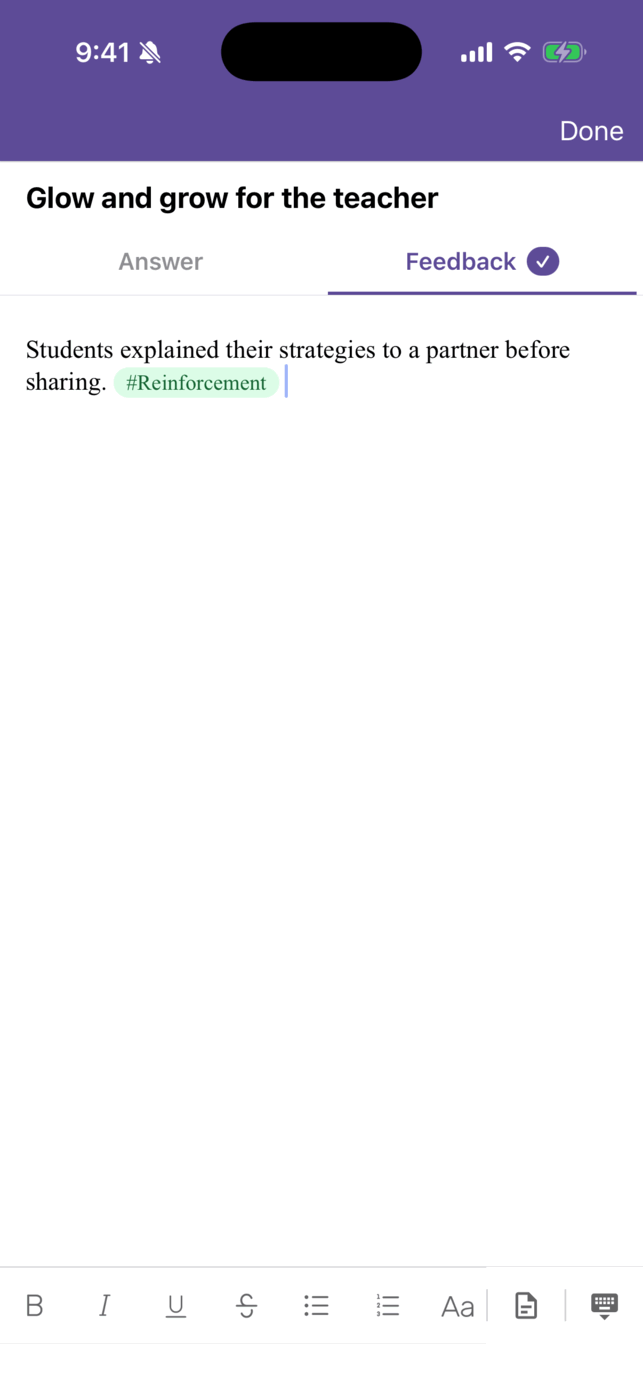
Tag feedback with
Section titled “Tag feedback with”Type # anywhere in feedback to open a short menu. The top of the menu has the sentiments Reinforcement and Refinement; below them are your district’s focus-area tags. Tap one to insert it as a colored chip. These are the same sentiments and focus-area tags your district uses on the web.
Insert a feedback template
Section titled “Insert a feedback template”- Tap the templates button on the toolbar (the page icon).
- Search with Search templates…, or narrow the list with the Sentiment and Tags filters. Templates suggested for this question are listed first, under Suggested.
- Tap a template to insert its text, along with its sentiment and tag chips.
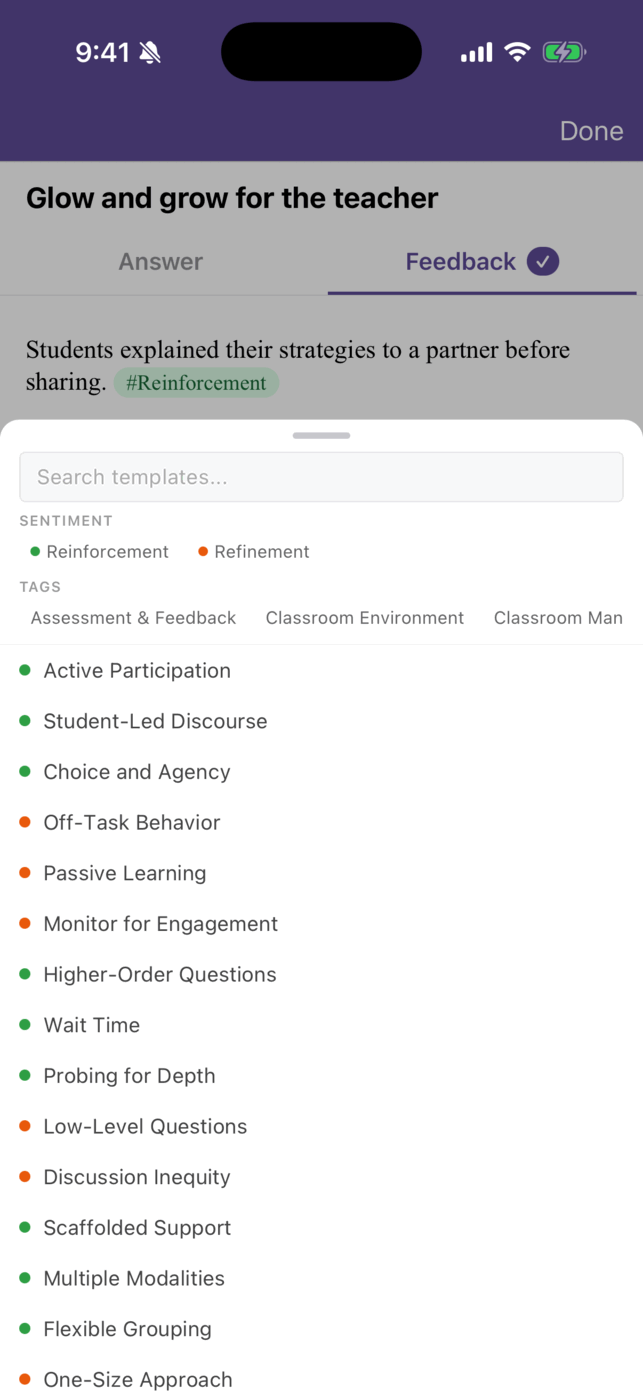
Templates and tags are managed on the web. See How-to Guide: Feedback Templates, Tags, and Focus-Area Mentions.
Add photos and video
Section titled “Add photos and video”When a question allows attachments, use its Files tab to add evidence from the classroom.
- Open the question and tap Files.
- Tap Add file.
- Choose Take Photo, Take Video, or Choose from Library. From the library you can pick several photos or videos at once.
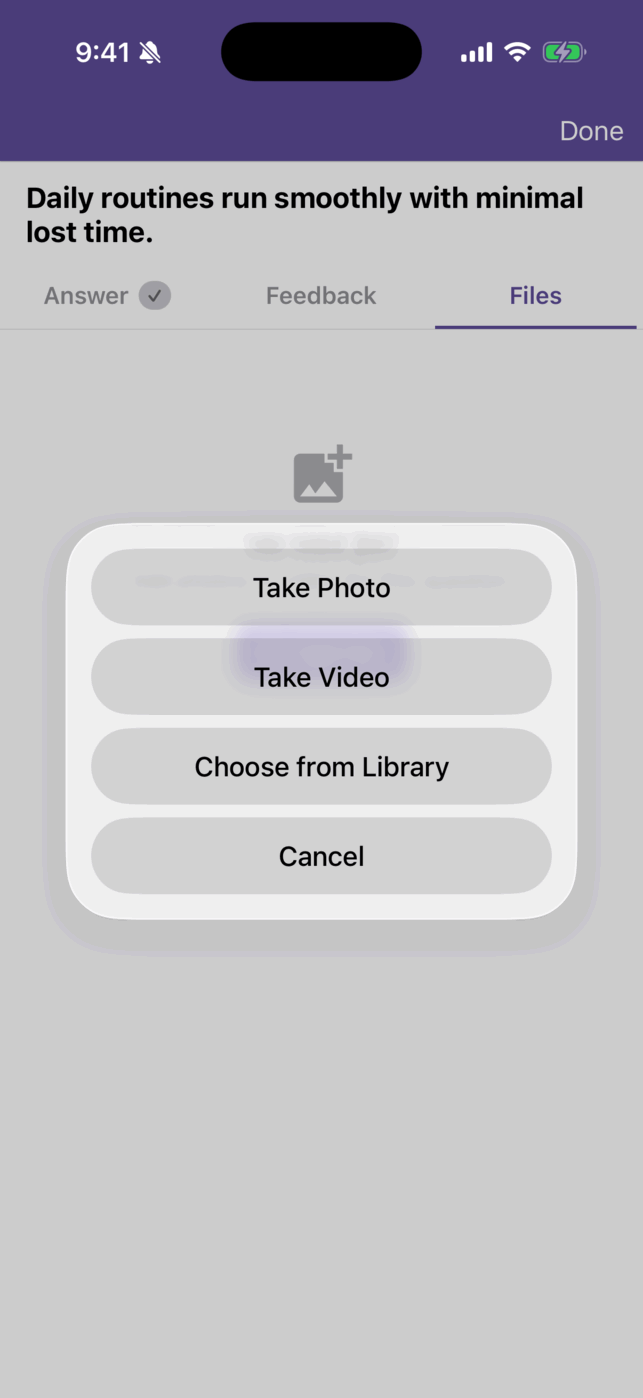
The files appear as thumbnails on the Files tab. Tap one to view it full screen; tap Done to close the viewer.
Keep these in mind:
- Photos and video only. The app can’t attach PDFs or other documents. Add those on the web: see Comments and Attachments.
- Files upload when you save the observation, not when you add them. The Saving Observation window shows the upload progress. Large videos take longer on a slow connection.
- The first time you use the camera, your phone asks for permission. If you said no, the app shows Camera Unavailable; tap Open Settings to allow camera access.