

Administration
Setting Up Schools and Groups
Add schools and groups, nest them under one another, and set what each one allows, from System Administration > Organizations/Groups.
Every school, office, and team in your district is an organization in Master Teacher. Where a person is assigned decides what they can see: their own organization and everything nested under it. Schools also carry the class periods, grade levels, and content areas that observers pick from, so a school’s setup shapes every observation recorded there.
You manage all of this on the Organizations/Groups page.
Who can do this: system administrators. A system administrator assigned to the district sees every organization; one assigned to a single school sees that school and what is nested under it (see How far your access reaches). Organization administrators do not have this page.
The Organizations/Groups list
Section titled “The Organizations/Groups list”Open System Administration, then Organizations/Groups under GENERAL.
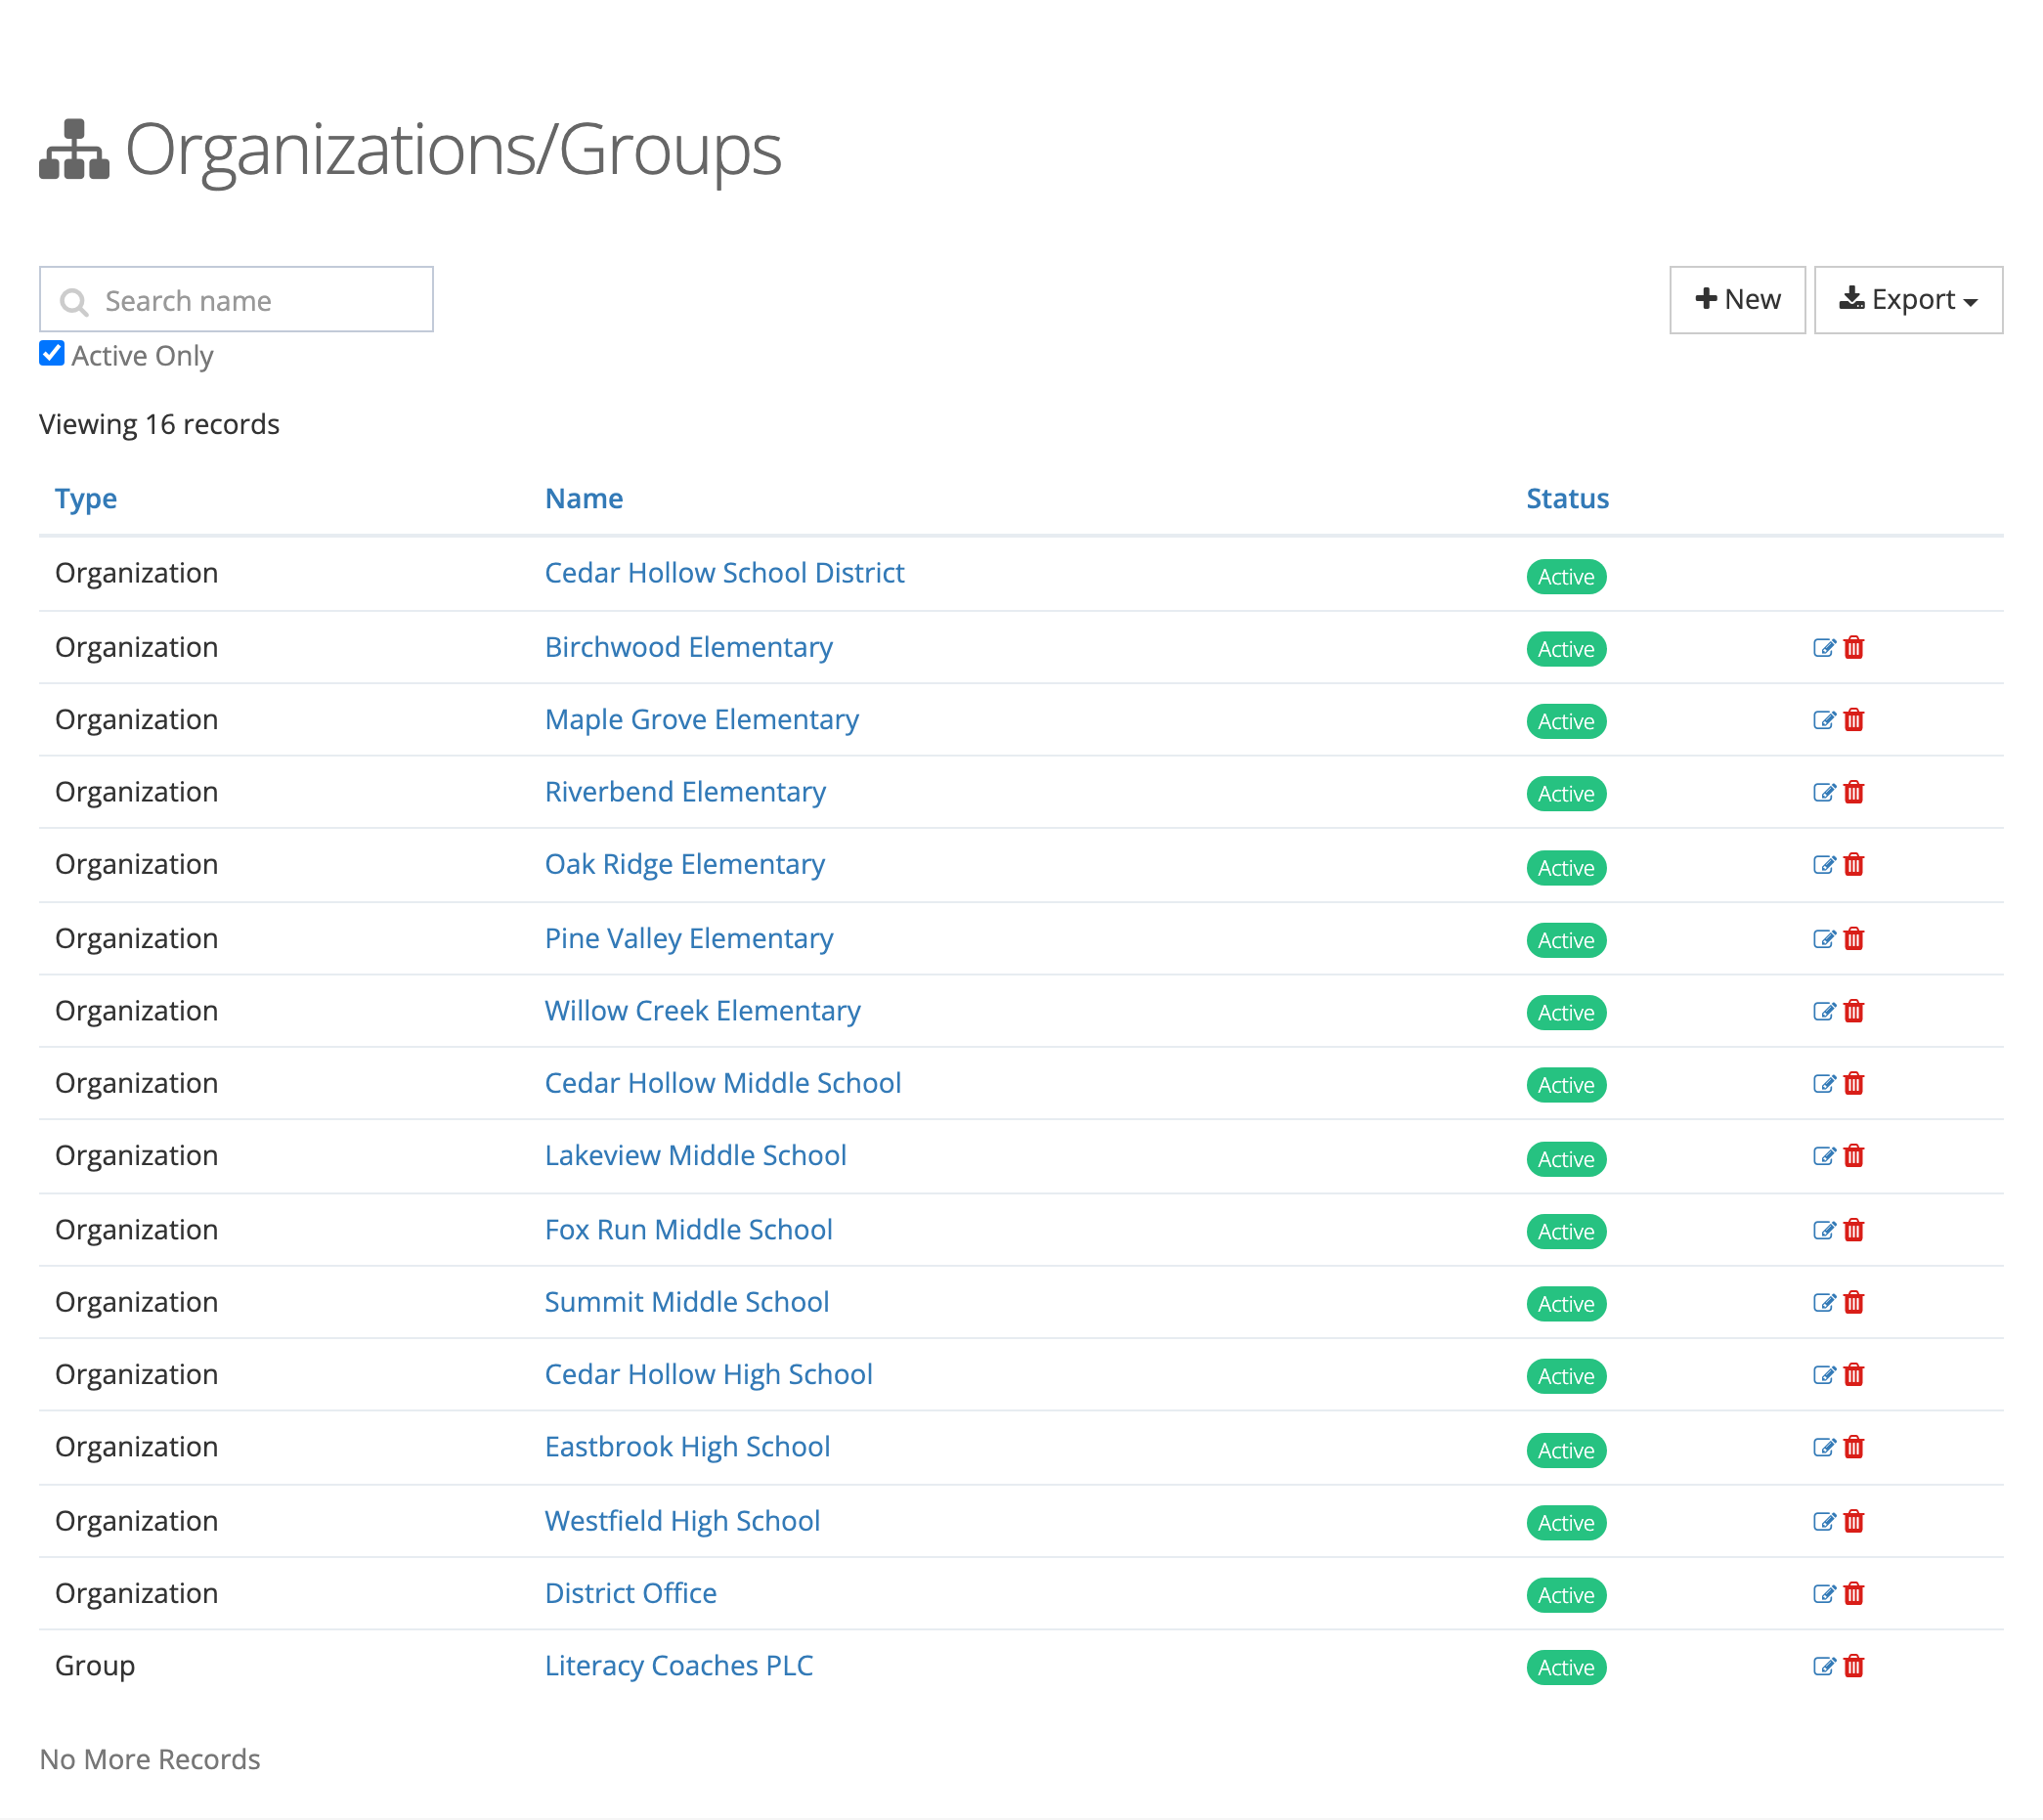
The list shows each organization’s Type, Name, and Status. Click a column heading to sort by it.
- Search name filters the list as you type.
- Active Only is checked when the page opens. Clear it to include inactive schools.
- The edit and delete icons on each row open the same windows as the Edit and Delete buttons on that organization’s page. The delete icon appears only for system administrators assigned to the district; one assigned to a school uses Delete on the organization’s page.
- Export downloads the list as a PDF or CSV.
The district itself is the first row. It has no edit or delete icons (see The district record).
Organization or group
Section titled “Organization or group”The Type field has two choices:
- Organization: a school or building, such as an elementary school or the district office.
- Group: a set of people or schools that is not a building, such as a professional learning community, a department, or a feeder pattern.
Both types work the same way. The type changes the label in the list and the icon on the organization’s page, so pick the one that tells other administrators what the record is.
How nesting works
Section titled “How nesting works”Organizations nest under one another. The district sits at the top, and the seeded schools are its sub organizations. You can nest further: put a group under the district, then attach schools to that group.
Nesting controls reach. A person assigned to an organization can see the organizations nested under it. For example, if you create an “Elementary Schools” group, attach the six elementary schools to it, and assign your elementary director to the group, the director sees all six schools without being assigned to each one.
An organization can belong to more than one parent. Its page lists every parent under Member of.
Adding a school or group
Section titled “Adding a school or group”Add an organization from the page of the organization it belongs under, so it lands in the right place in the tree.
- Open the district (or the school or group the new one belongs under) from the list.
- Select the Sub Organizations tab.
- Click New. The New Organization window opens.
- Enter a Name, choose a Type, and set the other fields (described below).
- Click Save.
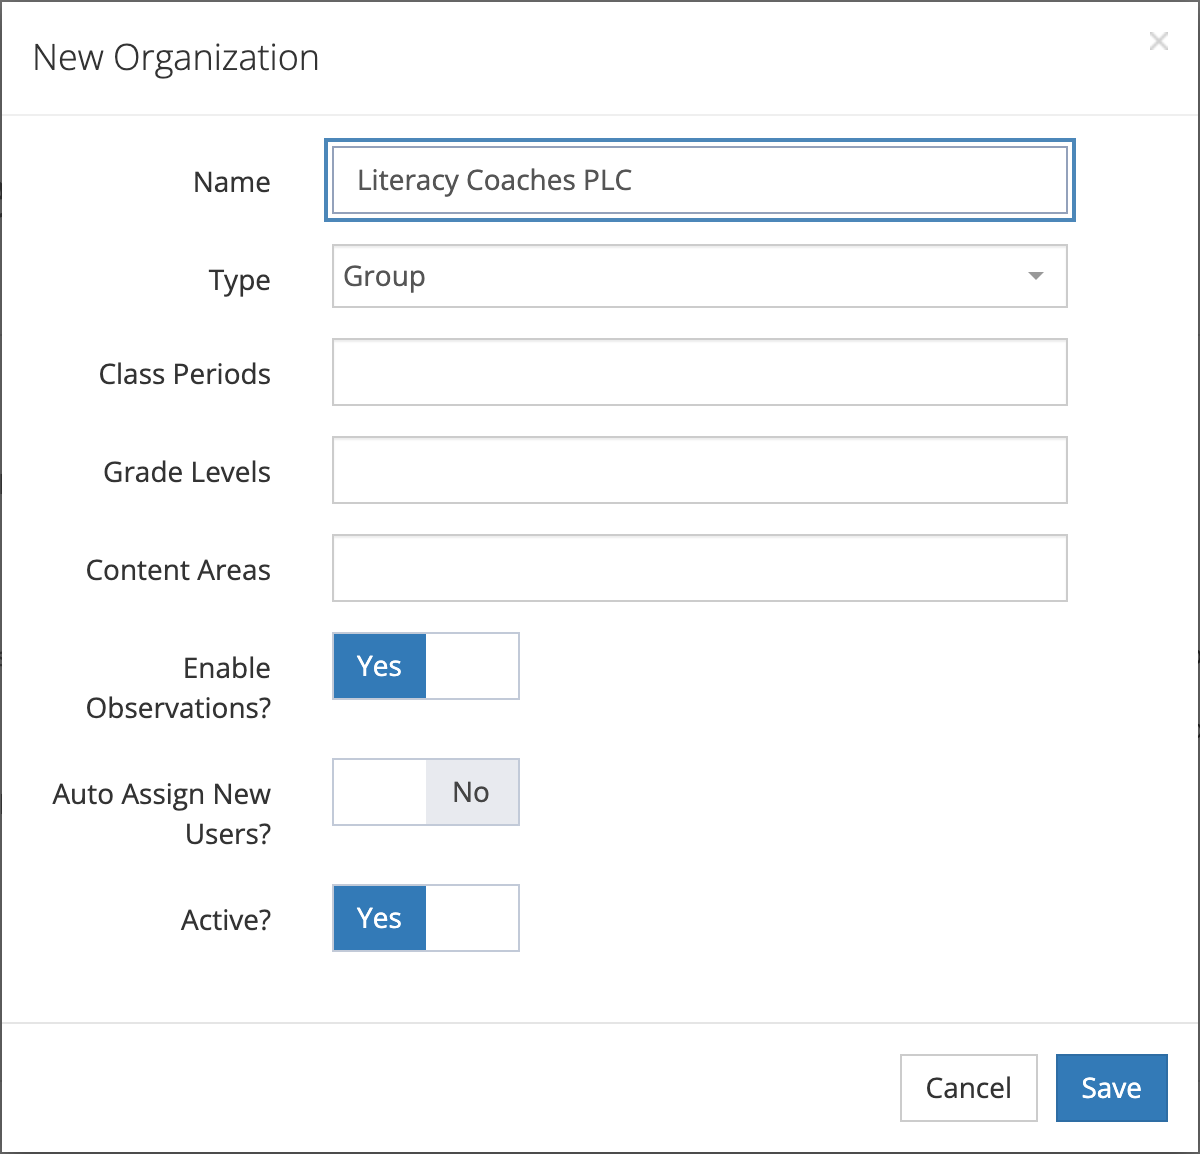
New on the main Organizations/Groups list also opens this window, but it adds the organization without a parent. It is not on any organization’s Sub Organizations tab until you attach it somewhere. A system administrator assigned to the district still sees it in the main list; one assigned only to a school does not, so add from the parent’s Sub Organizations tab instead.
Names must be unique in your district. If a name is taken, the window says so and asks you to attach the existing organization instead.
Attaching existing organizations
Section titled “Attaching existing organizations”To move existing schools under a group or another organization:
- Open the organization that should be the parent.
- Select the Sub Organizations tab and click Attach.
- In the Attach Organizations window, choose the organizations to nest under this one.
- Click Save.
The window opens with the current sub organizations already selected. Removing one from the selection and saving detaches it. You can also click the unlink icon on a row of the Sub Organizations tab, which opens Remove membership. Either way, only the link is removed; the organization itself is not deleted.
Attach appears only when you can edit the parent and the district has other organizations to offer. On the district’s own page you see New but not Attach.
The organization form
Section titled “The organization form”Open an organization and click Edit, or click the edit icon on its row. The Edit Organization window has the same fields as New Organization.
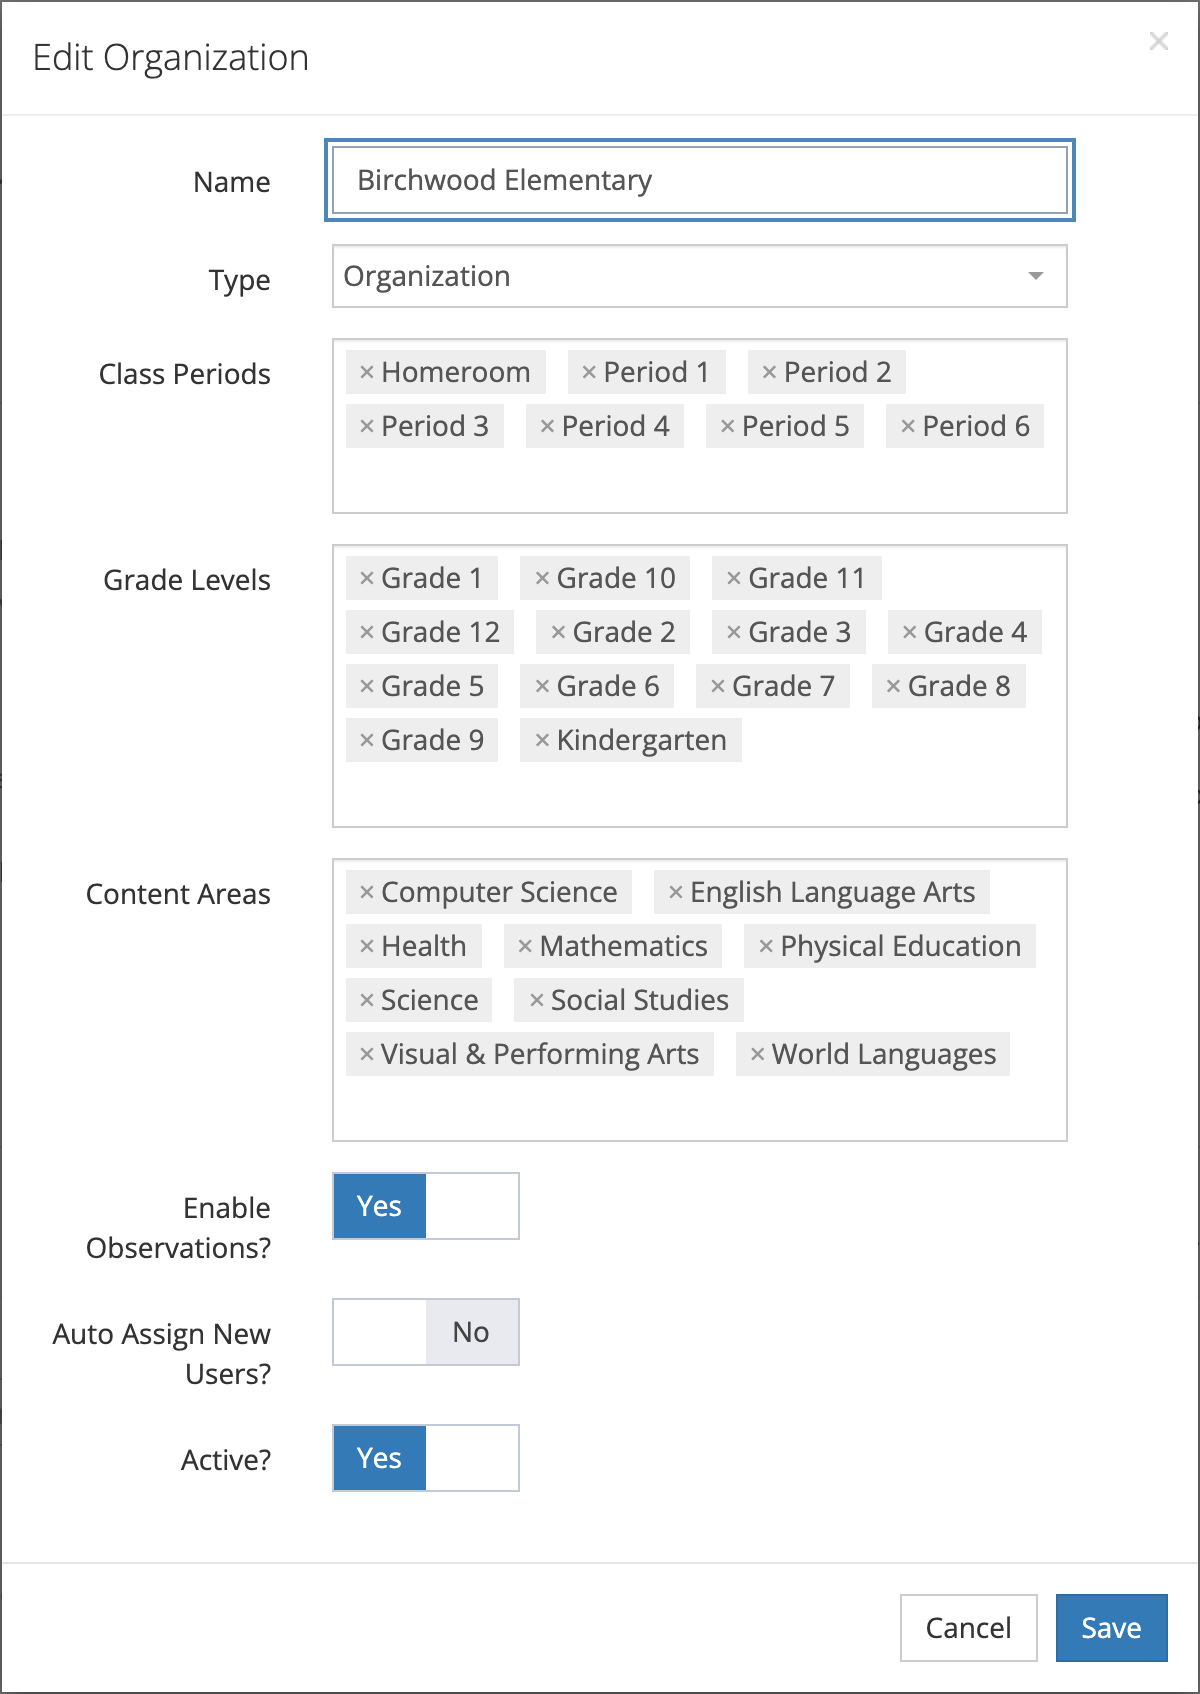
| Field | What it changes |
|---|---|
| Name | The name shown in pickers, reports, and on observations. |
| Type | Organization or Group (see above). |
| Class Periods | The class periods observers can pick when they record an observation at this school. Choose from your district’s list. |
| Grade Levels | The grade levels offered on observations at this school. |
| Content Areas | The content areas offered on observations at this school. |
| Enable Observations? | Whether observers can choose this school when they start an observation. On by default. |
| Auto Assign New Users? | Whether every new account in the district is added to this organization when it is created. Off by default. |
| Active? | Whether the organization is in use. On by default. |
Class Periods, Grade Levels, Content Areas, and Enable Observations? appear only when your district uses weCLIMB. The lists they draw from are managed under Subdivisions; see Class Periods, Content Areas, and Grade Levels.
Enable Observations?
Section titled “Enable Observations?”A school appears in the school list on a new observation only when Enable Observations? is on and the school is ready: it has class periods, grade levels, content areas, at least one person who can be observed, and an active form set. Turn it off for a building where no one is observed, such as the district office or a transportation department, so observers never see it as a choice. The full checklist is in Getting a School Ready for Observations.
Auto Assign New Users?
Section titled “Auto Assign New Users?”When this is on, every account created in your district from then on is added to this organization, whether you add the person on Manage Users, import them from a file, or the account is created when they first sign in or through directory sync. People who already have accounts are not added. Assign them on Manage Users or with Attach on the Users tab.
Use it for an organization everyone should belong to, such as a district-wide professional learning group. Leave it off for schools, or every new hire will be assigned to that school.
Active?
Section titled “Active?”Turn Active? off when a school closes, merges, or stops using Master Teacher. An inactive organization:
- no longer appears in the school list on a new observation;
- is not offered when you assign organizations on the user form;
- is hidden from the Organizations/Groups list while Active Only is checked.
Its observations, its users, and its settings stay as they were. Turn Active? back on to bring it back.
Deactivate instead of deleting
Section titled “Deactivate instead of deleting”Delete (on the organization’s page, or the trash icon on its row) opens Delete Organization. Clicking Delete Organization removes the organization, the organizations created under it, the observations, evaluations, and performance reviews recorded at it, and its user memberships. The window gives no warning about the observations, and it cannot be undone. Organizations that were attached rather than created under it are only unlinked. To retire a school and keep its history for reports and evaluations, turn Active? off instead.
The organization’s page
Section titled “The organization’s page”Click an organization’s name to open its page. The top shows its name and status, its short name, Member of, its ID, when it was created and last updated, Auto Assign New Users, and, with weCLIMB, Observations Enabled and the class periods, grade levels, and content areas attached to it. If the school is not ready for observations, a red Requirements to enable observations list names what is missing.
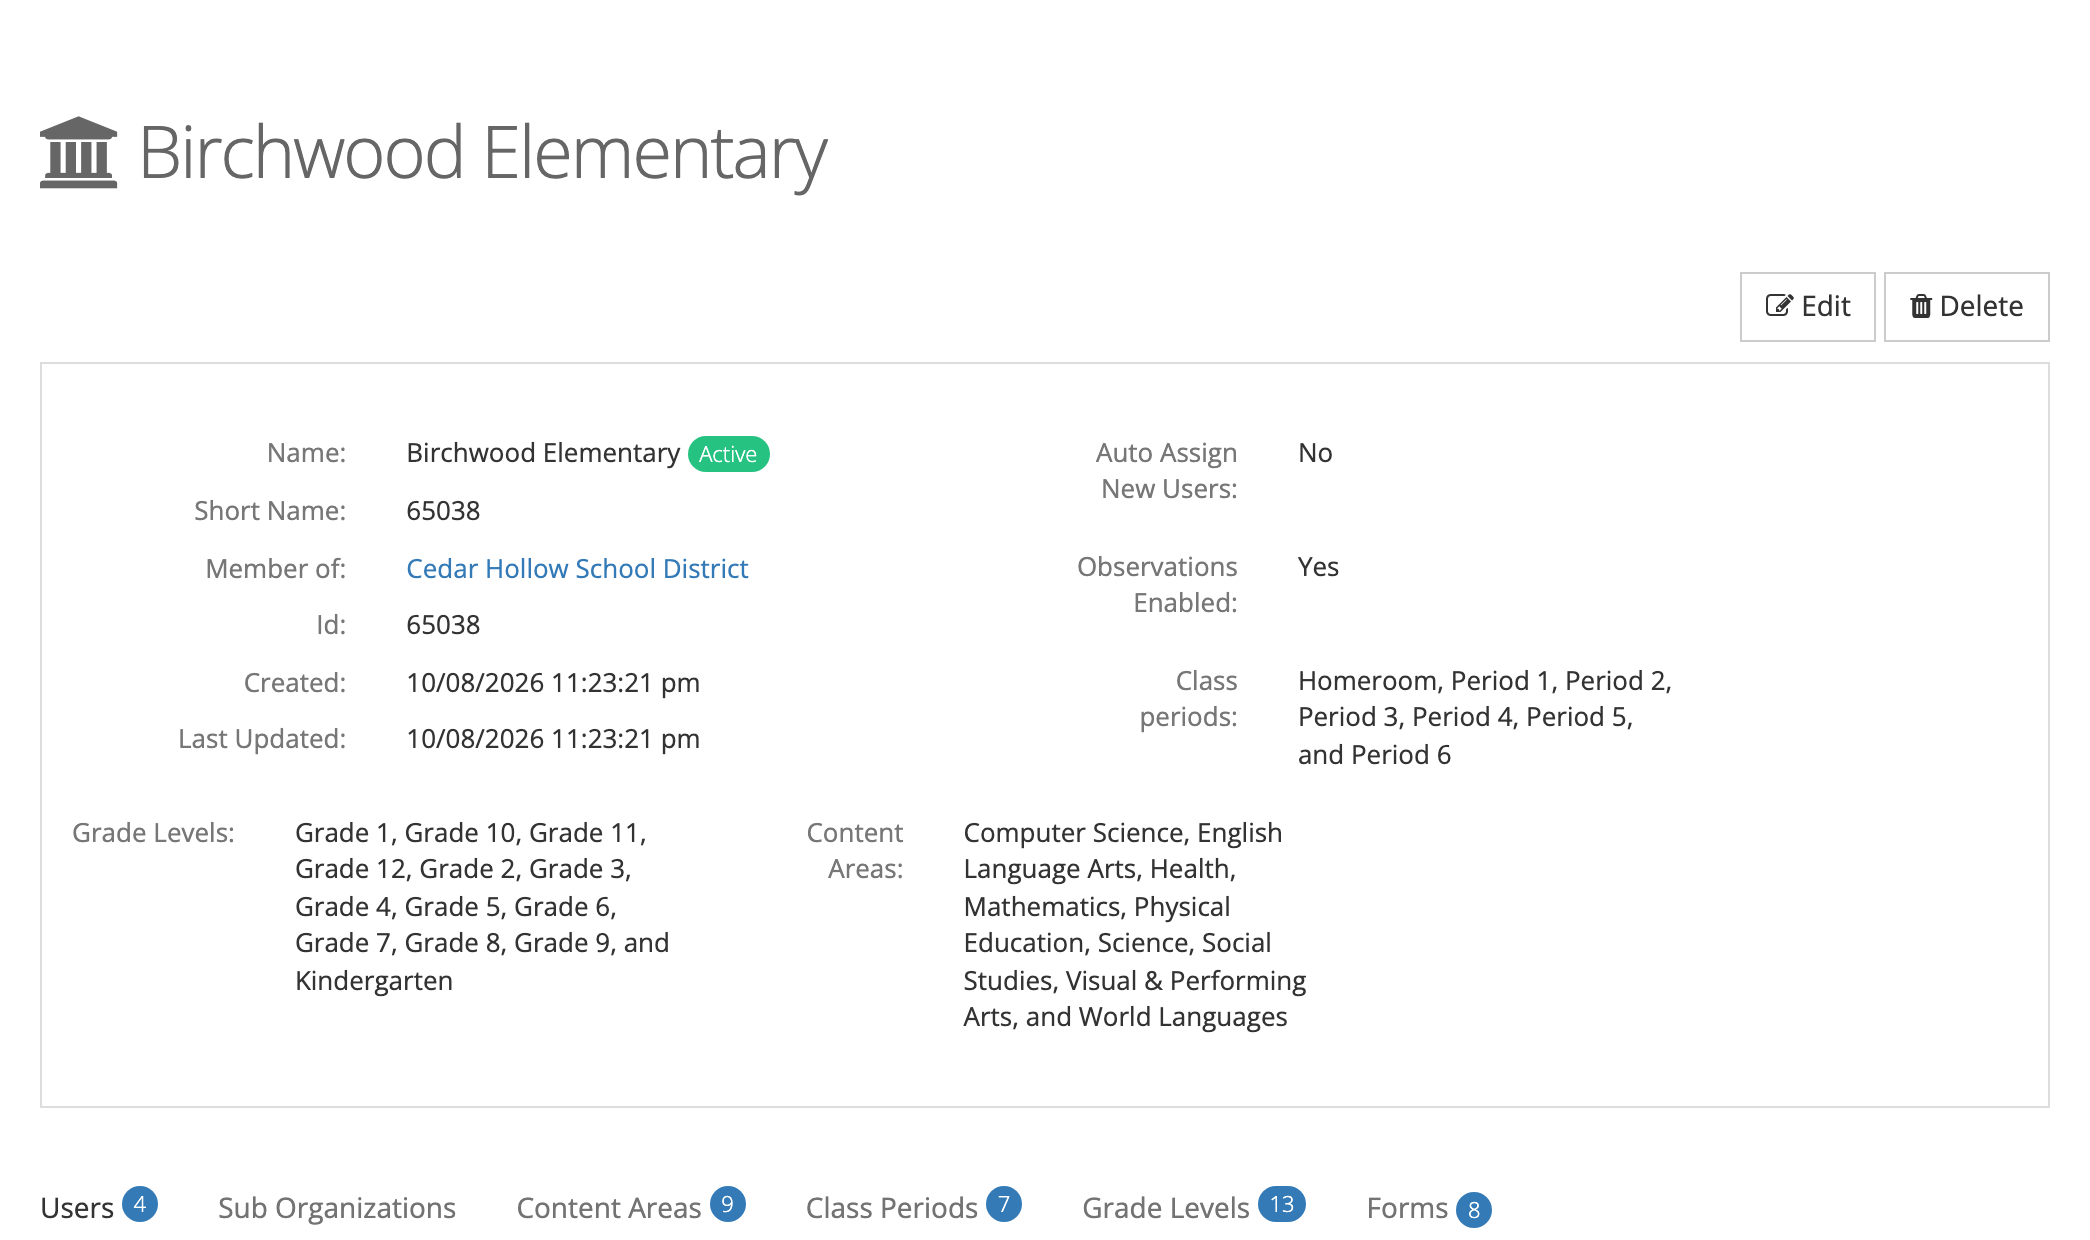
The tabs below the details:
- Users: the people assigned to this organization. Attach adds people who already have accounts, and New opens the new-user form with this organization filled in. On a row, the edit icon opens that person’s user form and the unlink icon opens Remove Member, which takes the person out of this organization. The tab also has Filter, Show Archived Users, and Export.
- Sub Organizations: the organizations nested under this one, with New and Attach as described above.
- Content Areas, Class Periods, Grade Levels: the items attached to this organization. See Class Periods, Content Areas, and Grade Levels.
- Forms (with weCLIMB): the observation forms this school can use. See Getting a School Ready for Observations.
The district record
Section titled “The district record”The district’s page has no Edit or Delete button for district staff. The district’s name, short name, website, time zone, and whether it is active are kept by your Master Teacher account representative. Contact them to change any of these. You can still add and view sub organizations from the district’s page.